Pages

Thursday, November 14, 2024

Ultimate Buffalo Wings Recipe


Buffalo Wings

Ingredients:

  • 2 lbs chicken wings
  • Salt and black pepper to taste
  • 1 cup all-purpose flour (for extra crispiness, optional)
  • 1 cup hot sauce (like Frank’s RedHot for classic flavor)
  • 1/2 cup unsalted butter, melted
  • 1 tbsp white vinegar
  • 1/2 tsp Worcestershire sauce
  • 1/4 tsp garlic powder
  • Oil for frying (vegetable or canola oil recommended)

Instructions:

  1. Prep the Wings:

    • Rinse and pat dry the chicken wings. Season them lightly with salt and black pepper.
    • For extra crispiness, lightly coat the wings in flour, shaking off any excess.
  2. Fry the Wings:

    • In a large pot or deep fryer, heat oil to 375°F (190°C). Ensure there’s enough oil to fully submerge the wings.
    • Fry the wings in batches, avoiding overcrowding, for about 10-12 minutes until golden brown and crispy. (To bake instead, preheat oven to 400°F (200°C), spread wings on a lined baking sheet, and bake for 40-45 minutes, flipping halfway.)
  3. Prepare the Buffalo Sauce:

    • In a saucepan over low heat, combine hot sauce, melted butter, vinegar, Worcestershire sauce, and garlic powder. Stir gently until the mixture is smooth and warmed.
  4. Coat the Wings:

    • Place the cooked wings in a large mixing bowl. Pour the warm Buffalo sauce over the wings, tossing until all wings are well coated.
  5. Serve:

    • Serve the Buffalo wings hot with celery sticks and your choice of ranch or blue cheese dressing on the side.

Enjoy your Ultimate Buffalo Wings! Crispy on the outside, tender on the inside, with just the right kick of spice!

Wednesday, November 13, 2024

Sweet & Savory Cranberry Apple Dijon Pork Loin with Cider Glaze


Cranberry Dijon Pork Loin Roast with Apple Cider Glaze
 

Recipe Title: Cranberry Dijon Pork Loin Roast with Apple Cider Glaze 🍏🍇

Enhanced Recipe Title for Search Engines:
"Sweet & Savory Cranberry Apple Dijon Pork Loin with Cider Glaze" – Perfect for Holidays and Family Dinners!

Detailed Preparation Instructions:

Ingredients:

  • For the Pork Loin:

    • 3-4 lb pork loin roast
    • 1/2 cup Dijon mustard
    • 1/4 cup brown sugar
    • 2 tbsp olive oil
    • 2 tsp dried thyme
    • 2 cloves garlic, minced
    • Salt and pepper, to taste
  • For the Cranberry Apple Topping:

    • 1 cup fresh cranberries
    • 1 large apple, diced
    • 1/4 cup brown sugar
    • 1/4 tsp cinnamon
    • 1/4 tsp nutmeg
    • 1 tbsp butter
  • For the Apple Cider Glaze:

    • 1 cup apple cider
    • 2 tbsp Dijon mustard
    • 2 tbsp brown sugar
    • 1 tbsp balsamic vinegar

Directions:

  1. Preheat Oven: Set oven to 375°F (190°C).

  2. Prepare the Pork Loin:

    • In a bowl, mix Dijon mustard, brown sugar, olive oil, thyme, garlic, salt, and pepper.
    • Rub the mixture all over the pork loin, ensuring it’s evenly coated.
  3. Roast the Pork:

    • Place the pork loin in a roasting pan.
    • Roast for 1 hour to 1 hour 15 minutes (around 20 minutes per pound), until it reaches an internal temperature of 145°F (63°C).
    • Once done, cover with foil and let it rest for 10 minutes before slicing.
  4. Make the Cranberry Apple Topping:

    • While the pork is roasting, melt butter in a saucepan over medium heat.
    • Add cranberries, apple, brown sugar, cinnamon, and nutmeg.
    • Cook for about 10 minutes, stirring occasionally, until the cranberries pop and the apples soften. Set aside.
  5. Prepare the Apple Cider Glaze:

    • In a separate saucepan, mix apple cider, Dijon mustard, brown sugar, and balsamic vinegar.
    • Simmer for about 10 minutes, reducing it by half until it becomes thick and glaze-like.
  6. Serve:

    • Slice the pork loin and arrange on a platter.
    • Spoon the cranberry apple topping over the pork, and drizzle generously with the apple cider glaze.

This flavorful roast combines the juicy pork with sweet and tangy cranberry-apple topping and an apple cider glaze that brings everything together. Perfect for impressing guests at special occasions.

Sunday, November 10, 2024

Classic Italian Lasagna


Classic Italian Lasagna

Here’s a detailed recipe for Classic Italian Lasagna with step-by-step instructions:

Ingredients

For the Meat Sauce (RagĂč Bolognese)

  • 1 lb (450 g) ground beef
  • 1/2 lb (225 g) ground pork
  • 1 large onion, finely chopped
  • 2 cloves garlic, minced
  • 1 large carrot, finely chopped
  • 2 celery stalks, finely chopped
  • 1 can (28 oz) crushed tomatoes
  • 2 tbsp tomato paste
  • 1/2 cup red wine (optional, for depth of flavor)
  • 1/2 cup beef or chicken broth
  • 1/2 tsp salt
  • 1/4 tsp black pepper
  • 1 tsp dried basil
  • 1 tsp dried oregano
  • 1 tbsp olive oil

For the Béchamel Sauce

  • 4 tbsp unsalted butter
  • 1/4 cup all-purpose flour
  • 3 cups whole milk, warmed
  • Salt and pepper to taste
  • A pinch of nutmeg (optional)

For Assembly

  • 12 lasagna noodles (cooked according to package instructions or no-boil)
  • 1 1/2 cups ricotta cheese
  • 2 cups shredded mozzarella cheese
  • 1/2 cup grated Parmesan cheese
  • Fresh basil for garnish (optional)

Instructions

Step 1: Make the Meat Sauce

  1. Sauté the Vegetables: In a large skillet or saucepan, heat olive oil over medium heat. Add chopped onion, carrot, and celery. Sauté until soft, about 5-7 minutes.
  2. Cook the Meat: Add ground beef and pork to the pan. Cook, breaking up the meat with a spoon, until browned.
  3. Add Garlic and Tomatoes: Add garlic and cook for another minute until fragrant. Stir in tomato paste, crushed tomatoes, wine (if using), and broth.
  4. Season the Sauce: Add salt, pepper, basil, and oregano. Stir well.
  5. Simmer: Reduce the heat to low, cover partially, and let the sauce simmer for 30-45 minutes, stirring occasionally until thickened. Set aside.

Step 2: Prepare the Béchamel Sauce

  1. Melt the Butter: In a medium saucepan, melt butter over medium heat.
  2. Make a Roux: Add the flour and whisk constantly for 1-2 minutes to remove the raw flour taste.
  3. Add Milk: Slowly add the warm milk, whisking continuously until the mixture is smooth.
  4. Season: Add salt, pepper, and a pinch of nutmeg (if desired).
  5. Thicken the Sauce: Continue to cook, whisking frequently, until the sauce thickens enough to coat the back of a spoon. Remove from heat.

Step 3: Assemble the Lasagna

  1. Preheat the Oven: Preheat oven to 375°F (190°C).
  2. Layer the Ingredients:
    • Spread a thin layer of meat sauce on the bottom of a 9x13-inch baking dish.
    • Place a layer of lasagna noodles on top.
    • Spread a layer of bĂ©chamel sauce over the noodles, followed by a layer of ricotta, some meat sauce, and a sprinkle of mozzarella and Parmesan.
    • Repeat this layering process until all ingredients are used, ending with a final layer of noodles topped with bĂ©chamel sauce and the remaining mozzarella and Parmesan.
  3. Bake: Cover the dish with aluminum foil and bake for 25 minutes. Remove the foil and bake for an additional 20 minutes, or until the cheese is bubbly and golden brown.
  4. Let Rest: Allow the lasagna to rest for 10-15 minutes before slicing.

Step 4: Serve

  • Garnish with fresh basil if desired, and serve warm. Enjoy your delicious homemade Classic Italian Lasagna!

Saturday, November 9, 2024

Crispy Garlic Potatoes


Crispy Garlic Potatoes

Here’s a detailed recipe for Crispy Garlic Potatoes:

Ingredients:

  • 4 large potatoes (Yukon Gold or Russet)
  • 3 tablespoons olive oil
  • 4 cloves garlic, minced
  • 1 teaspoon dried rosemary or fresh rosemary, finely chopped
  • 1 teaspoon dried thyme or fresh thyme, finely chopped
  • Salt and black pepper, to taste
  • Fresh parsley, chopped (for garnish)

Instructions:

  1. Prep the Potatoes:

    • Preheat the oven to 400°F (200°C).
    • Wash and peel the potatoes, then cut them into bite-sized cubes for faster cooking and a crispier finish.
  2. Season the Potatoes:

    • In a large mixing bowl, combine the olive oil, minced garlic, rosemary, and thyme. Add salt and black pepper to taste.
    • Add the potato cubes to the bowl and toss them thoroughly, making sure every piece is evenly coated with the oil and seasoning.
  3. Bake the Potatoes:

    • Spread the potatoes out in a single layer on a baking sheet lined with parchment paper to prevent sticking.
    • Bake in the preheated oven for about 30-40 minutes. Halfway through (around 15-20 minutes in), flip the potatoes to ensure even crispiness on all sides.
  4. Final Touch:

    • Once golden and crispy, remove the potatoes from the oven.
    • Garnish with freshly chopped parsley for a pop of color and flavor.
  5. Serve:

    • Serve the crispy garlic potatoes hot as a side dish or a snack. They're perfect with a dipping sauce or served alongside grilled meats.

Enjoy your Crispy Garlic Potatoes—full of flavor and perfect for any occasion!

Wednesday, November 6, 2024

cupcakes recipes


Here's a detailed recipe for simple and delicious cupcakes:

Ingredients:

  • 1 1/2 cups all-purpose flour
  • 1/2 cup sugar
  • 1/4 cup butter (softened)
  • 1/2 cup milk
  • 1 teaspoon vanilla extract
  • 1 egg
  • 1/2 teaspoon baking powder
  • 1/4 teaspoon baking soda
  • Pinch of salt

Instructions:

  1. Prepare the oven: Preheat your oven to 180°C (350°F). Line a muffin tin with cupcake liners.

  2. Mix dry ingredients: In a large bowl, mix the flour, baking powder, baking soda, and salt. Set aside.

  3. Cream the butter and sugar: In another bowl, beat the softened butter with the sugar until light and fluffy. Using an electric mixer is recommended for a creamy texture.

  4. Add egg and vanilla: Add the egg and continue beating until well combined, then add the vanilla extract.

  5. Alternate dry and wet ingredients: Gradually add the flour mixture and milk to the butter mixture, alternating between them. Start with the flour, then add milk, until everything is just combined. Avoid overmixing.

  6. Pour batter into cupcake liners: Divide the batter evenly among the cupcake liners, filling each about two-thirds full.

  7. Bake the cupcakes: Bake in the oven for 15-20 minutes, or until a toothpick inserted into the center comes out clean.

  8. Cool and decorate: Let the cupcakes cool completely before decorating with buttercream, chocolate, or a dusting of powdered sugar.

Decoration Tips:

  • Use buttercream or melted chocolate to top your cupcakes, or add colorful sprinkles or mini chocolate chips.

Enjoy your delicious cupcakes!


Tuesday, November 5, 2024

Mediterranean Hearty Delight Pizza


Mediterranean Hearty Delight Pizza

Ingredients:

  • Pizza Dough: 1 store-bought or homemade pizza dough (about 12 inches)
  • Tomato Sauce: 1 cup marinara or pizza sauce
  • Mozzarella Cheese: 2 cups shredded
  • Feta Cheese: ½ cup crumbled
  • Italian Sausage or Ground Beef: ½ pound, cooked and crumbled
  • Bell Pepper: 1, diced (use a mix of colors if desired)
  • Red Onion: ½, thinly sliced
  • Olives: ¼ cup, sliced (black or green)
  • Cherry Tomatoes: ½ cup, halved
  • Spinach Leaves: 1 cup, roughly chopped
  • Dried Oregano: 1 tsp
  • Salt and Pepper: to taste
  • Olive Oil: 1 tbsp, for drizzling


Instructions:

  1. Preheat the Oven: Heat the oven to 475°F (245°C) and place a pizza stone or baking sheet inside.

  2. Prepare the Dough: Roll out the pizza dough on a lightly floured surface until it reaches your desired thickness. Transfer the dough to a piece of parchment paper for easy handling.

  3. Add the Sauce: Spread the tomato sauce evenly over the pizza dough, leaving about a 1-inch border around the edges.

  4. Top with Cheese and Meat: Sprinkle the mozzarella cheese over the sauce, followed by crumbled feta. Then, add the cooked sausage or ground beef evenly across the pizza.

  5. Add Vegetables: Scatter the diced bell pepper, red onion, olives, cherry tomatoes, and spinach leaves over the top.

  6. Season: Sprinkle with oregano, salt, and pepper for extra flavor.

  7. Drizzle with Olive Oil: Lightly drizzle olive oil over the toppings.

  8. Bake the Pizza: Using a pizza peel or flat baking sheet, slide the pizza (with parchment paper) onto the preheated pizza stone or baking sheet. Bake for 10-12 minutes or until the crust is golden and the cheese is bubbly.

  9. Serve and Enjoy: Remove the pizza from the oven, let it cool for a few minutes, slice, and enjoy your Mediterranean Hearty Delight Pizza!

Monday, November 4, 2024

Sweet Potato Peanut Stew Recipe


Sweet Potato Peanut Stew Recipe


Ingredients

  • 1 tbsp vegetable oil
  • 1 medium onion, diced
  • 3 cloves garlic, minced
  • 1 tbsp fresh ginger, minced
  • 1 tsp ground cumin
  • 1 tsp ground coriander
  • 1/2 tsp ground turmeric (optional)
  • 1/4 tsp cayenne pepper (optional, for heat)
  • 1/4 tsp black pepper
  • Salt, to taste
  • 1 large sweet potato, peeled and diced
  • 1 red bell pepper, diced
  • 1 can (14.5 oz) diced tomatoes
  • 1/4 cup natural peanut butter
  • 4 cups vegetable broth
  • 1 can (14 oz) coconut milk (optional, for extra creaminess)
  • 1 cup kale or spinach, roughly chopped
  • 1/4 cup roasted peanuts, chopped (for garnish)
  • Fresh cilantro, chopped (for garnish)
  • Lime wedges, for serving


Instructions

  1. Heat the Oil
    In a large pot, heat the vegetable oil over medium heat. Add the diced onion and sauté for 5-7 minutes, until soft and translucent.

  2. Add Aromatics
    Stir in the garlic and ginger, and cook for another 1-2 minutes until fragrant. Then, add cumin, coriander, turmeric, cayenne pepper, black pepper, and a pinch of salt. Stir well to coat the onions in the spices.

  3. Add Sweet Potatoes and Peppers
    Add the diced sweet potato and red bell pepper. Stir everything together and let it cook for 2-3 minutes to blend the flavors.

  4. Add Tomatoes and Peanut Butter
    Pour in the can of diced tomatoes and add the peanut butter. Stir until the peanut butter is fully combined and smooth.

  5. Pour in Broth
    Add the vegetable broth and bring the stew to a boil. Once boiling, reduce the heat to low, cover the pot, and let it simmer for 20-25 minutes, or until the sweet potatoes are tender.

  6. Add Coconut Milk and Greens
    Stir in the coconut milk (if using) for extra creaminess. Add the kale or spinach, and cook for another 3-5 minutes, until the greens are wilted.

  7. Season and Garnish
    Taste the stew and adjust seasoning as needed with more salt or pepper. Serve hot, garnished with chopped peanuts, fresh cilantro, and a squeeze of lime juice for brightness.

Serving Suggestions

This stew pairs beautifully with rice, quinoa, or crusty bread. Enjoy!

Sunday, November 3, 2024

Bang Bang Chicken Spicy Chicken Bites


Recipe: Crispy Spicy Chicken Bites (Inspired by Bang Bang Chicken)

Ingredients

  • For the Chicken:

    • 1 lb (450g) boneless, skinless chicken breast, cut into small bite-sized pieces
    • 1 cup buttermilk (or substitute with regular milk + 1 tsp vinegar, let sit for 5 minutes)
    • 1 cup all-purpose flour
    • 1 cup cornstarch
    • Salt and black pepper, to taste
    • Vegetable oil, for frying
  • For the Sauce:

    • 1/4 cup mayonnaise
    • 1/4 cup sweet chili sauce
    • 1-2 tbsp sriracha or hot sauce (adjust to taste)
    • 1 tbsp honey
    • 1 tsp rice vinegar (optional, for extra tang)
  • For Garnishing:

    • Chopped green onions
    • Sesame seeds


Instructions

  1. Marinate the Chicken:

    • Place the chicken pieces in a bowl and cover with buttermilk. Let marinate for 20-30 minutes to make the chicken tender and flavorful.
  2. Prepare the Coating and Fry:

    • In a shallow bowl, mix the flour, cornstarch, salt, and pepper.
    • Heat oil in a large skillet or deep fryer to 350°F (175°C).
    • Remove chicken pieces from buttermilk, letting the excess drip off, and dredge them in the flour mixture. Coat each piece well, pressing lightly to make the coating stick.
    • Carefully drop the coated chicken pieces into the hot oil in batches. Fry each batch for about 4-5 minutes, or until golden and crispy. Transfer fried chicken to a plate lined with paper towels to absorb extra oil.
  3. Make the Sauce:

    • In a separate bowl, mix together mayonnaise, sweet chili sauce, sriracha, honey, and rice vinegar until smooth. Adjust the sriracha for desired heat.
  4. Assemble and Serve:

    • Place the fried chicken pieces in a large bowl and pour the sauce over them. Gently toss until all the pieces are evenly coated in sauce.
    • Garnish with chopped green onions and sesame seeds.
  5. Enjoy!

    • Serve immediately for the best flavor and crunch! Perfect as an appetizer or snack.

Spicy Crispy Chicken


Ingredients

  • For the Chicken:

    • 1 lb (450g) chicken breast, cut into bite-sized pieces
    • 1 cup buttermilk (or regular milk with a splash of vinegar as a substitute)
    • 1 cup all-purpose flour
    • 1 cup cornstarch
    • Salt and pepper, to taste
    • Oil, for frying
  • For the Sauce:

    • 1/4 cup mayonnaise
    • 1/4 cup sweet chili sauce
    • 1-2 tbsp sriracha (adjust to taste for spiciness)
    • 1 tbsp honey
    • 1 tsp rice vinegar (optional, for a slight tang)
  • To Garnish:

    • Chopped green onions
    • Sesame seeds


Instructions

  1. Prepare the Chicken:

    • In a bowl, soak the chicken pieces in buttermilk for 15-20 minutes. This helps to tenderize the chicken and keeps it juicy.
    • In another bowl, mix the flour, cornstarch, salt, and pepper.
  2. Coat and Fry the Chicken:

    • Heat oil in a deep skillet or fryer over medium-high heat until it reaches about 350°F (175°C).
    • Take each piece of chicken from the buttermilk, let the excess drip off, then coat it in the flour mixture. Press gently to ensure the flour sticks well.
    • Carefully place the coated chicken into the hot oil, frying in batches to avoid overcrowding. Fry for 4-5 minutes until golden and crispy. Remove and place on a paper towel to drain any excess oil.
  3. Make the Sauce:

    • In a bowl, mix together mayonnaise, sweet chili sauce, sriracha, honey, and rice vinegar until smooth and creamy. Adjust sriracha if you want more or less spice.
  4. Combine and Serve:

    • Toss the fried chicken pieces in the prepared sauce until evenly coated.
    • Transfer to a serving dish, then garnish with chopped green onions and sesame seeds.
  5. Enjoy!

    • Serve immediately to enjoy the crispy texture with a spicy-sweet flavor.


Saturday, November 2, 2024

Morton's Steakhouse Chicken Christopher


Morton's Steakhouse Chicken Christopher

Ingredients:

For the Chicken:

  • 2 large boneless, skinless chicken breasts
  • Salt and pepper, to taste
  • 1 cup all-purpose flour
  • 2 large eggs, beaten
  • 1 cup breadcrumbs
  • 3 tbsp butter
  • 2 tbsp olive oil

For the Garlic Butter Sauce:

  • 1/4 cup butter
  • 3 garlic cloves, minced
  • 1/4 cup white wine (optional)
  • 1/4 cup heavy cream
  • 1 tbsp lemon juice
  • Salt and black pepper, to taste
  • Fresh parsley, chopped (for garnish)


Instructions:

Step 1: Prepare the Chicken

  1. Season the chicken breasts with salt and pepper. If the breasts are thick, consider pounding them to an even thickness for faster cooking.
  2. Dredge each chicken breast in flour, dip in beaten eggs, and then coat with breadcrumbs.

Step 2: Cook the Chicken

  1. Heat butter and olive oil in a large skillet over medium heat.
  2. Add the breaded chicken and cook until golden brown and cooked through (about 5-6 minutes per side, depending on thickness).
  3. Remove the chicken from the skillet and set aside, keeping it warm.

Step 3: Make the Garlic Butter Sauce

  1. In the same skillet, add the butter and minced garlic. Sauté until fragrant (about 1 minute).
  2. Stir in the white wine (if using) and let it reduce for 1-2 minutes.
  3. Add the heavy cream, lemon juice, salt, and pepper. Let it simmer until the sauce thickens slightly.

Step 4: Serve

  1. Plate each chicken breast and generously spoon the garlic butter sauce over the top.
  2. Garnish with fresh parsley and serve with your favorite side, like mashed potatoes or steamed vegetables.

Enjoy this rich and elegant dish that brings Morton’s Steakhouse experience to your table.


Cheesy Garlic Chicken Wraps - Recipes Cookery


Cheesy Garlic Chicken Wraps - Recipes Cookery

Ingredients:

  • 2 large chicken breasts, cooked and shredded
  • 1 cup shredded mozzarella cheese
  • 1/2 cup shredded cheddar cheese
  • 1/4 cup cream cheese, softened
  • 2 tbsp butter
  • 3 garlic cloves, minced
  • Salt and pepper, to taste
  • 1/2 tsp Italian seasoning
  • 4 large tortillas or wraps
  • Fresh parsley or green onions, for garnish (optional)


Instructions:

Step 1: Prepare the Cheesy Chicken Filling

  1. In a skillet, melt butter over medium heat. Add minced garlic and sauté until fragrant (about 1 minute).
  2. Add shredded chicken, cream cheese, mozzarella, cheddar, Italian seasoning, salt, and pepper. Stir until everything is well-mixed and cheese is melted and gooey.

Step 2: Assemble the Wraps

  1. Place a tortilla on a flat surface and spoon a generous amount of the cheesy chicken mixture onto the center.
  2. Fold the sides over the filling, then roll up tightly to form a wrap.

Step 3: Toast the Wraps

  1. In a clean skillet over medium heat, lightly toast each wrap for 1-2 minutes per side until golden and crispy.

Step 4: Serve

  1. Slice each wrap in half, garnish with parsley or green onions if desired, and enjoy warm with your favorite dipping sauce.

Perfect for lunch, dinner, or a snack, these Cheesy Garlic Chicken Wraps are simple yet packed with flavor!

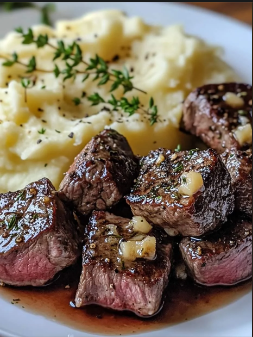
Garlic Butter Steak Bites with Creamy Mashed Potatoes


Garlic Butter Steak Bites with Creamy Mashed Potatoes

Ingredients:

For the Steak Bites:

  • 1 lb (450g) steak (sirloin or ribeye), cut into bite-sized pieces
  • 3 tbsp butter
  • 4 garlic cloves, minced
  • Salt and black pepper, to taste
  • Fresh parsley, chopped (for garnish)

For the Mashed Potatoes:

  • 4 large potatoes, peeled and cubed
  • 3 tbsp butter
  • 1/4 cup milk (more if needed for creaminess)
  • Salt and black pepper, to taste

Instructions:

Step 1: Prepare the Mashed Potatoes

  1. Boil potatoes in a large pot with salted water until tender (about 15-20 minutes).
  2. Drain, then mash the potatoes with butter, milk, salt, and pepper until smooth and creamy. Set aside and keep warm.

Step 2: Cook the Steak Bites

  1. Season the steak pieces with salt and black pepper.
  2. Heat a large skillet over medium-high heat and add 1 tablespoon of butter.
  3. Sear steak bites in batches (to avoid overcrowding), cooking for 1-2 minutes per side for a medium-rare finish. Remove from skillet and set aside.
  4. In the same skillet, add the remaining butter and minced garlic. Sauté for about 1 minute until fragrant, then return the steak bites to the skillet and toss to coat in the garlic butter.

Step 3: Serve

  1. Serve the garlic butter steak bites over a scoop of creamy mashed potatoes.
  2. Garnish with fresh parsley for a touch of color and flavor.

Enjoy your delicious, easy-to-make Garlic Butter Steak Bites with Mashed Potatoes!

Friday, November 1, 2024

Garlic Butter Steak Bites with Crispy Potatoes


Garlic Butter Steak Bites with Crispy Potatoes


Here’s a detailed recipe for Garlic Butter Steak Bites with Crispy Potatoes – a hearty, flavorful dish perfect for any occasion!

Ingredients:

For the Potatoes:

  • 1 1/4 pounds small gold potatoes – quartered (about 1/2” thick)
  • 2 tablespoons ghee or butter
  • Sea salt and black pepper – to taste

For the Steak Bites:

  • 1 pound sirloin steak – cut into bite-sized pieces
  • 2 tablespoons butter
  • 4 cloves garlic – minced
  • 1 teaspoon fresh thyme (optional)
  • Salt and black pepper – to taste
  • Fresh parsley – chopped, for garnish


Instructions:

  1. Cook the Potatoes:

    • In a large skillet, heat the ghee or butter over medium heat. Add the quartered potatoes in a single layer.
    • Season with salt and pepper, and cook for about 10-15 minutes, stirring occasionally, until they are golden and crispy on the outside and tender on the inside. Once cooked, transfer the potatoes to a plate and set aside.
  2. Prepare the Steak Bites:

    • In the same skillet, add the butter over medium-high heat. Once melted, add the steak pieces in a single layer, seasoning with salt and pepper.
    • Sear the steak bites for about 2-3 minutes per side, or until they are cooked to your desired doneness.
    • Add the minced garlic and fresh thyme (if using), and cook for another 1-2 minutes, stirring to coat the steak bites in the garlic butter.
  3. Combine and Serve:

    • Add the cooked potatoes back to the skillet, tossing everything together to mix the flavors.
    • Garnish with fresh parsley and serve warm.

Enjoy these delicious, garlic-buttery steak bites and crispy potatoes – a perfect meal for steak lovers!

Creamy Garlic Parmesan Pasta


Creamy Garlic Parmesan Pasta

 Here's a detailed recipe for a delicious dish that your husband can't resist! Although you didn’t specify a particular dish, I’ll create a versatile recipe that can easily be adapted. Here’s a recipe for Creamy Garlic Parmesan Pasta – rich, flavorful, and definitely a crowd-pleaser!

Ingredients:

  • 8 oz (about 225g) pasta (fettuccine, spaghetti, or your choice)
  • 2 tablespoons butter
  • 4 cloves garlic (minced)
  • 1 cup heavy cream
  • 1 cup grated Parmesan cheese
  • Salt and pepper to taste
  • 1 teaspoon Italian seasoning (optional)
  • Fresh parsley (chopped, for garnish)
  • Red pepper flakes (optional, for a spicy kick)


Instructions:

  1. Cook the Pasta:

    • Bring a large pot of salted water to a boil. Add the pasta and cook according to package instructions until al dente. Drain and set aside, reserving a little pasta water.
  2. Make the Sauce:

    • In a large skillet, melt the butter over medium heat. Add the minced garlic and sautĂ© for about 1-2 minutes until fragrant but not browned.
    • Pour in the heavy cream and bring it to a gentle simmer. Stir in the Parmesan cheese until melted and smooth.
  3. Combine:

    • Add the cooked pasta to the sauce, tossing to coat. If the sauce is too thick, add a splash of the reserved pasta water to reach your desired consistency.
    • Season with salt, pepper, and Italian seasoning, if using.
  4. Serve:

    • Plate the creamy pasta and garnish with chopped parsley and red pepper flakes, if desired.
  5. Enjoy:

    • Serve immediately while warm and enjoy this delicious dish that everyone will love!

Feel free to customize this recipe by adding cooked chicken, shrimp, or your favorite vegetables for an extra twist. Enjoy! 

apple puff pastry turnovers


apple puff pastry turnovers

Here’s a detailed recipe for Apple Turnovers with Puff Pastry – a quick, delicious dessert with a warm apple-cinnamon filling wrapped in flaky pastry!

Ingredients:

  • 1 package puff pastry (usually contains 2 sheets; thawed if frozen)
  • 2 medium apples (peeled, cored, and diced small)
  • 1/4 cup brown sugar
  • 1 teaspoon cinnamon
  • 1 tablespoon butter
  • 1 teaspoon cornstarch (optional, for thickening)
  • 1 tablespoon water
  • 1 egg (for egg wash)
  • Powdered sugar (optional, for dusting)


Instructions:

  1. Prepare the Apple Filling:

    • In a skillet over medium heat, melt the butter. Add the diced apples, brown sugar, and cinnamon. Stir to coat the apples.
    • Cook for about 5-7 minutes until the apples are softened. If the mixture is too runny, dissolve the cornstarch in 1 tablespoon of water and add it to the skillet to thicken.
    • Set aside the filling to cool slightly.
  2. Prepare the Puff Pastry:

    • Preheat your oven to 400°F (200°C) and line a baking sheet with parchment paper.
    • Roll out each puff pastry sheet slightly and cut into 4 equal squares, giving you 8 squares in total.
  3. Assemble the Turnovers:

    • Place a spoonful of apple filling onto one half of each pastry square, leaving space around the edges.
    • Fold the pastry over the filling to form a triangle. Use a fork to press the edges firmly together, sealing the turnovers.
  4. Egg Wash and Bake:

    • Beat the egg with a tablespoon of water to make an egg wash. Brush the tops of the turnovers with the egg wash to help them turn golden brown.
    • Place the turnovers on the prepared baking sheet and bake for 15-18 minutes, or until puffed and golden.
  5. Serve:

    • Let the turnovers cool slightly, then dust with powdered sugar if desired. Serve warm and enjoy!

These apple turnovers are perfect on their own or with a scoop of vanilla ice cream. 

buttermilk fried chicken tenders


buttermilk fried chicken tenders

Here's a detailed recipe for Buttermilk Fried Chicken Tenders – crispy, juicy, and packed with flavor!

Ingredients:

  • 1 lb chicken tenders (or boneless, skinless chicken breasts cut into strips)
  • 1 cup buttermilk
  • 1 large egg
  • 1 cup all-purpose flour
  • 1/2 cup cornstarch (for extra crunch)
  • 1 teaspoon salt
  • 1 teaspoon black pepper
  • 1 teaspoon paprika
  • 1/2 teaspoon garlic powder
  • 1/2 teaspoon onion powder
  • 1/2 teaspoon cayenne pepper (optional, for a spicy kick)
  • Vegetable oil for frying

Instructions:

  1. Prepare the Marinade: In a medium bowl, whisk together the buttermilk and egg. Add a pinch of salt and pepper if desired. Place the chicken tenders in the buttermilk mixture, cover, and marinate in the refrigerator for at least 1 hour (or up to overnight for more flavor).

  2. Prepare the Breading: In a large shallow dish, mix the flour, cornstarch, salt, black pepper, paprika, garlic powder, onion powder, and cayenne pepper. This mixture will create a crispy, flavorful coating.

  3. Coat the Chicken: Remove the chicken tenders from the buttermilk marinade, allowing excess buttermilk to drip off. Dredge each piece in the flour mixture, pressing lightly to ensure the coating sticks well. Place the breaded tenders on a plate and let them sit for a few minutes to help the coating adhere.

  4. Heat the Oil: In a deep frying pan or heavy skillet, heat about 1 inch of vegetable oil over medium-high heat. It’s ready when it reaches 350°F (175°C) or when a small piece of breading sizzles and floats.

  5. Fry the Chicken: Carefully add the chicken tenders in batches, frying for about 4-5 minutes per side or until golden brown and cooked through. Avoid overcrowding the pan to keep the oil temperature steady.

  6. Drain and Serve: Use tongs to remove the tenders, placing them on a paper towel-lined plate to drain excess oil.

  7. Enjoy: Serve hot with your favorite dipping sauces like ranch, honey mustard, or BBQ sauce.

These buttermilk fried chicken tenders are crispy on the outside, juicy on the inside, and perfect for any occasion.

Marinated Cucumbers, Onions, and Tomatoes


Marinated Cucumbers, Onions, and Tomatoes


Here’s a detailed recipe for Marinated Cucumbers, Onions, and Tomatoes – a fresh and tangy salad that's perfect as a side or light snack!

Ingredients:

  • 2-3 large cucumbers – peeled and sliced
  • 3 medium tomatoes – diced
  • 1 large Vidalia onion – sliced into rings (separate the rings)
  • 1/4 cup white vinegar
  • 1/4 cup olive oil (or vegetable oil if preferred)
  • 1/4 cup water
  • 1 tablespoon sugar (optional, for a slightly sweet tang)
  • 1 teaspoon salt
  • 1 teaspoon black pepper
  • 1/2 teaspoon dried oregano (or use fresh basil if you prefer)
  • 1 clove garlic – minced (optional for extra flavor)


Instructions:

  1. Prepare the Vegetables: Place the sliced cucumbers, diced tomatoes, and onion rings in a large mixing bowl.

  2. Make the Marinade: In a small bowl, whisk together the vinegar, olive oil, water, sugar (if using), salt, pepper, and oregano until well combined.

  3. Combine and Marinate: Pour the marinade over the vegetables and toss everything gently to coat.

  4. Chill: Cover the bowl with plastic wrap and refrigerate for at least 1-2 hours to allow the flavors to meld together. This step is key for the best flavor!

  5. Serve: Give the salad a quick toss before serving. Enjoy it chilled for a refreshing taste!

This marinated salad can be enjoyed as a side dish or on its own. It’s super versatile and tastes even better the next day!

Thursday, October 31, 2024

Cheesy Pepperoni Stromboli


Cheesy Pepperoni Stromboli

Here’s a simple and tasty recipe for Cheesy Pepperoni Stromboli:

Ingredients:

  • 1 pizza dough (store-bought or homemade)
  • 1 cup marinara or pizza sauce
  • 1 ½ cups shredded mozzarella cheese
  • 20-25 slices of pepperoni
  • 1 tbsp melted butter or olive oil
  • 1 tsp garlic powder
  • 1 tsp Italian seasoning (optional)
  • Fresh basil or parsley, chopped (for garnish)

Instructions:

  1. Preheat the Oven: Preheat your oven to 400°F (200°C). Line a baking sheet with parchment paper or lightly grease it.

  2. Roll Out the Dough: On a floured surface, roll out the pizza dough into a rectangle, about 10x14 inches in size.

  3. Layer the Ingredients: Spread a thin layer of marinara or pizza sauce over the dough, leaving a 1-inch border around the edges. Sprinkle mozzarella cheese evenly over the sauce, then layer pepperoni slices on top of the cheese.

  4. Roll and Seal: Starting from one of the longer edges, carefully roll the dough into a log shape. Pinch the edges to seal, then tuck and seal the ends as well.

  5. Prepare for Baking: Place the Stromboli seam-side down on the baking sheet. Brush the top with melted butter or olive oil and sprinkle with garlic powder and Italian seasoning.

  6. Bake: Bake for 15-20 minutes, or until the dough is golden brown and crispy.

  7. Slice and Serve: Allow the Stromboli to cool slightly, then slice it into pieces. Garnish with fresh basil or parsley and serve with extra marinara sauce for dipping.


Tips:

  • Add Veggies: Include bell peppers, mushrooms, or onions for extra flavor.
  • Make it Spicy: Add a sprinkle of red pepper flakes if you like a little heat.

Enjoy your Cheesy Pepperoni Stromboli

Cheesy Garlic Chicken Wraps


Cheesy Garlic Chicken Wraps


Ingredients:

  • 2 chicken breasts (sliced into strips)
  • Salt and pepper, to taste
  • 1 tsp garlic powder
  • 1 tsp paprika
  • 1 tbsp olive oil
  • 1 cup shredded mozzarella cheese (or any preferred cheese blend)
  • 4 tortillas or wraps
  • 2 tbsp garlic butter (melted; optional for extra flavor)
  • Fresh parsley, chopped (for garnish)

Instructions:

  1. Season the Chicken: In a mixing bowl, add chicken strips, salt, pepper, garlic powder, and paprika. Toss to coat the chicken evenly.

  2. Cook the Chicken: Heat olive oil in a pan over medium-high heat. Add the seasoned chicken strips and cook for 5-7 minutes until fully cooked and golden brown. Set aside.

  3. Prepare the Wraps: Lay a tortilla flat and sprinkle a generous amount of cheese in the center.

  4. Add Chicken: Place a few chicken strips over the cheese in each tortilla.

  5. Fold the Wraps: Fold the tortilla over the chicken and cheese, tucking in the sides, and roll it up tightly.

  6. Toast the Wraps: Heat a clean pan over medium heat. Brush each wrap with melted garlic butter for extra flavor, then place it seam-side down on the pan. Toast each side for 2-3 minutes or until the cheese melts and the wrap is golden and crispy.

  7. Serve and Garnish: Once toasted, slice the wraps in half. Garnish with chopped parsley for a fresh look and extra flavor.


Tips:

  • For Extra Flavor: Serve with a side of marinara or ranch dressing.
  • Add Veggies: For more texture, add lettuce, sliced tomatoes, or avocado inside the wraps.

Enjoy your delicious Cheesy Garlic Chicken Wraps!

Wednesday, October 23, 2024

Mastering the Art of Sautéing: A Step-by-Step Guide for Beginners


Mastering the Art of Sautéing: A Step-by-Step Guide for Beginners

Sautéing is a quick and versatile cooking technique that brings out the best flavors in your ingredients. Whether you're cooking vegetables, meat, or fish, sautéing can help you achieve a delicious, evenly cooked meal in a matter of minutes. In this guide, we will walk you through the essential steps to master this technique, perfect for beginners looking to enhance their cooking skills.

What is Sautéing?

Sautéing involves cooking food quickly in a hot pan with a small amount of oil or fat. The goal is to brown the ingredients and develop rich flavors without overcooking them. It requires high heat, constant movement, and attention to detail.

Step-by-Step Guide to Sautéing

1. Choose the Right Pan

A good-quality skillet or sauté pan is essential for this technique. Choose a pan with a heavy bottom that distributes heat evenly, such as stainless steel or cast iron. Avoid nonstick pans for sautéing, as they don't brown food as well.

2. Preheat the Pan

Before adding any oil or ingredients, make sure your pan is hot. This helps to create the perfect sear on your food, locking in flavor and moisture. A good test is to sprinkle a few drops of water on the pan—if they evaporate instantly, the pan is ready.

3. Add the Right Amount of Oil

Use a high smoke-point oil like vegetable, canola, or avocado oil for sautéing. Heat the oil until it shimmers, but be careful not to let it smoke. You only need enough oil to lightly coat the bottom of the pan; too much oil can make your food greasy.

4. Don’t Overcrowd the Pan

One of the most common mistakes when sautĂ©ing is overcrowding the pan. This traps steam and prevents your food from browning properly. Cook in batches if necessary, ensuring there’s space between the pieces so that each one cooks evenly.

5. Keep the Food Moving

Once your ingredients are in the pan, use a spatula or tongs to keep them moving. Constant movement ensures even cooking and prevents sticking. For delicate ingredients like fish or tofu, gently shake the pan rather than stirring aggressively.

6. Season and Adjust as Needed

Season your food with salt, pepper, and any herbs or spices once it begins to brown. Taste as you go and adjust seasoning to your preference. You can also deglaze the pan with a splash of broth, wine, or lemon juice to create a flavorful sauce.


Tips for Perfect Sautéing

  • Use room temperature ingredients: Cold food lowers the temperature of the pan and prevents proper browning.
  • Dry your ingredients: Moisture creates steam, which hinders browning, so always pat your ingredients dry before sautĂ©ing.
  • Adjust the heat: If your food is browning too quickly, lower the heat slightly to avoid burning.
  • Deglaze for extra flavor: After sautĂ©ing, deglaze the pan to pick up the delicious browned bits, creating a sauce or glaze.

Common Sautéing Mistakes to Avoid

  • Using too much oil: This can make the food greasy and soggy instead of crispy and browned.
  • Not heating the pan enough: If the pan isn't hot enough, the food will steam rather than sear, resulting in a lack of flavor.
  • Overcrowding the pan: When food is packed too tightly, it doesn’t get the necessary airflow to cook properly, leading to uneven cooking.
  • Ignoring the food: SautĂ©ing requires attention; make sure to keep an eye on your food to prevent overcooking.

Conclusion

SautĂ©ing is an essential technique that every home cook should master. With practice, you'll develop a feel for the heat, timing, and flavors that make this method so effective. By following the steps and tips in this guide, you’ll be sautĂ©ing like a pro in no time, creating delicious and perfectly cooked meals with ease.

FAQs

  • Q: What’s the best oil for sautĂ©ing?
    A: High smoke-point oils like vegetable oil, canola oil, or avocado oil are ideal for sautéing.
  • Q: How do I know when the pan is hot enough to sautĂ©?
    A: You can sprinkle a few drops of water into the pan—if they evaporate instantly, it’s ready.
  • Q: Can I sautĂ© without oil?
    A: While oil helps with browning and preventing sticking, you can use alternatives like broth or water for a low-fat option, though the results may differ.
  • Q: Can I use butter for sautĂ©ing?
    A: Yes, but it’s best to mix butter with oil to prevent it from burning due to its low smoke point.
  • Q: How do I prevent my food from sticking?
    A: Ensure the pan is hot before adding food, and use enough oil to coat the bottom. Keeping the food moving also helps prevent sticking.

5 Superfoods to Elevate Your Everyday Cooking


5 Superfoods to Elevate Your Everyday Cooking


5 Superfoods to Elevate Your Everyday Cooking

Superfoods are nutrient-dense ingredients that provide a powerful boost to your overall health. By incorporating them into your everyday cooking, you not only improve the nutritional value of your meals, but also introduce new flavors and textures to your dishes. Here are five superfoods that can transform your cooking and take your culinary skills to the next level.

1. Quinoa: The Protein-Packed Grain

Quinoa is a complete protein, meaning it contains all nine essential amino acids. It’s also rich in fiber, vitamins, and minerals. This gluten-free grain is versatile and can be used in salads, stir-fries, and even breakfast bowls.

How to Use: Cook quinoa as a base for salads or use it as a substitute for rice or pasta. Try mixing cooked quinoa with roasted vegetables and a light vinaigrette for a healthy side dish.

2. Kale: The Nutrient Powerhouse

Kale is one of the most nutrient-dense vegetables available, packed with vitamins A, C, and K, as well as antioxidants. It’s incredibly versatile and can be used raw in salads, sautĂ©ed, or blended into smoothies.

How to Use: Add kale to your soups, stews, and stir-fries, or use it as a base for salads. For a quick snack, try making kale chips by baking the leaves with a bit of olive oil and sea salt.

3. Chia Seeds: Tiny But Mighty

Chia seeds may be small, but they’re loaded with fiber, omega-3 fatty acids, and antioxidants. They’re known for their ability to absorb liquid and form a gel-like texture, making them perfect for thickening smoothies, puddings, and baked goods.

How to Use: Stir chia seeds into your oatmeal, yogurt, or smoothies. You can also make chia pudding by mixing the seeds with almond milk and letting them sit overnight to thicken.

4. Avocado: The Healthy Fat

Avocados are rich in heart-healthy monounsaturated fats, which can help reduce cholesterol levels. They’re also high in fiber, potassium, and various vitamins. Avocados can be eaten raw, spread on toast, or blended into sauces and smoothies.

How to Use: Mash avocados for guacamole, spread them on toast, or blend them into a creamy dressing. For a unique twist, try adding sliced avocado to your smoothies for extra creaminess and nutrition.

5. Turmeric: The Anti-Inflammatory Spice

Turmeric is known for its anti-inflammatory properties, thanks to the compound curcumin. It adds a warm, earthy flavor and vibrant yellow color to dishes. Turmeric is commonly used in curries, soups, and smoothies.

How to Use: Add turmeric to soups, stews, and marinades. You can also make a soothing turmeric tea or golden milk by simmering turmeric with milk, honey, and spices.

Why Add Superfoods to Your Diet?

Superfoods offer a concentrated source of essential nutrients that can improve your health in numerous ways. By incorporating them into your meals, you can enhance your energy levels, support your immune system, and even reduce inflammation.

Beyond their health benefits, superfoods also add new textures and flavors to your dishes, making everyday meals more exciting and satisfying.

Conclusion

Adding superfoods to your everyday cooking is an easy way to boost the nutritional content of your meals while also exploring new flavors. Whether you're preparing a simple salad or a gourmet dinner, these five superfoods—quinoa, kale, chia seeds, avocado, and turmeric—can take your dishes to the next level. Start experimenting with these ingredients and enjoy the health benefits they bring to the table.

FAQs

  • Q: Can I eat raw quinoa?
    A: No, quinoa should be cooked before consuming. Raw quinoa is difficult to digest, and cooking helps release its nutrients.
  • Q: How do I prevent kale from tasting bitter?
    A: Massaging the kale with olive oil and a bit of lemon juice before eating raw helps to soften the leaves and reduce bitterness.
  • Q: Can chia seeds be eaten dry?
    A: Yes, chia seeds can be eaten dry, but they absorb a lot of water, so it's best to consume them with plenty of liquid or let them soak to avoid digestive issues.
  • Q: Is it safe to eat avocado every day?
    A: Yes, avocados are healthy and can be eaten daily in moderation. They are rich in nutrients, but high in calories, so balance is key.
  • Q: Does cooking turmeric reduce its health benefits?
    A: Cooking turmeric slightly reduces its curcumin content, but it still retains many of its health benefits. Pairing turmeric with black pepper can help increase its absorption.

Essential Kitchen Tools Every Home Chef Needs


Essential Kitchen Tools Every Home Chef Needs


Essential Kitchen Tools Every Home Chef Needs

Whether you're just starting out in the kitchen or you're a seasoned home chef, having the right tools can make all the difference. With the right kitchen gadgets, cooking becomes not only easier but also more enjoyable. In this article, we’ll explore the essential kitchen tools that every home chef should have to create delicious meals with efficiency and precision.

1. Chef’s Knife

A high-quality chef’s knife is arguably the most important tool in any kitchen. It’s versatile and can be used for slicing, dicing, chopping, and mincing a variety of ingredients. Invest in a well-balanced, sharp knife, as it will make food prep faster and safer.

Pro Tip: Keep your knife sharp with regular honing and occasional professional sharpening to maintain its edge and longevity.

2. Cutting Board

A sturdy cutting board is essential for food preparation. Choose a wooden or bamboo board for durability and knife protection, or a plastic one for easy sanitizing. Having both types can be handy for handling raw meats and vegetables separately.

Pro Tip: Opt for a cutting board with grooves around the edges to catch any liquids and prevent spills on your counter.

3. Measuring Cups and Spoons

Accuracy is key when it comes to cooking, especially in baking. A set of measuring cups and spoons ensures that you get the right amount of ingredients every time, whether you're following a recipe or experimenting with your own creations.

Pro Tip: Use dry measuring cups for ingredients like flour and sugar, and liquid measuring cups for oils, water, and milk to get the best results.

4. Mixing Bowls

Mixing bowls are an essential tool for combining ingredients, marinating meats, or tossing salads. Stainless steel or glass bowls are durable and versatile, while plastic bowls are lightweight and easier to handle.

Pro Tip: Look for nesting sets of bowls that save space and offer various sizes for different kitchen tasks.


5. Cast Iron Skillet

A cast iron skillet is a must-have for any home chef. It’s incredibly versatile and can be used for frying, baking, sautĂ©ing, and even grilling. It retains heat exceptionally well, giving you the perfect sear on meats and vegetables.

Pro Tip: Season your cast iron skillet regularly to keep it non-stick and rust-free, and avoid using soap when cleaning to maintain its seasoning.

6. Non-Stick Frying Pan

While a cast iron skillet is great for many tasks, a non-stick frying pan is ideal for cooking delicate foods like eggs, fish, and pancakes. It requires less oil and makes for easy flipping and cleanup.

Pro Tip: Use silicone or wooden utensils with non-stick pans to prevent scratching the surface.

7. Tongs

Tongs are essential for flipping, turning, and grabbing food without piercing it. They’re great for grilling, frying, and tossing salads. A good pair of tongs gives you more control than a spatula or fork.

Pro Tip: Look for tongs with silicone tips to prevent scratching your cookware and for heat resistance when handling hot foods.

8. Immersion Blender

An immersion blender is a handy tool for pureeing soups, sauces, and smoothies right in the pot or bowl. It eliminates the need to transfer hot liquids to a blender, saving you time and reducing mess.

Pro Tip: Choose an immersion blender with multiple speed settings to handle a variety of textures and consistencies.

9. Microplane Zester

This small, but mighty tool is perfect for grating citrus zest, cheese, garlic, and even spices like nutmeg. A microplane adds a burst of flavor to your dishes with minimal effort.

Pro Tip: Use it to grate fresh ginger or garlic into sauces for an instant flavor boost.

10. Digital Meat Thermometer

A meat thermometer is essential for ensuring your proteins are cooked to perfection. Whether you're roasting a chicken, grilling steaks, or baking fish, a thermometer takes the guesswork out of cooking meats to a safe and delicious temperature.

Pro Tip: Look for a digital thermometer with a quick-read function to get accurate readings in seconds.

Conclusion

Having the right tools in your kitchen can make a world of difference in how you cook. From a chef’s knife and cutting board to a cast iron skillet and immersion blender, these essential kitchen tools will not only improve your efficiency but also elevate your culinary skills. Whether you're preparing simple weeknight dinners or tackling more complex recipes, these tools are must-haves for every home chef.

FAQs

  • Q: How often should I sharpen my chef’s knife?
    A: It’s recommended to hone your knife after every few uses and get it professionally sharpened every 6-12 months depending on how often you cook.
  • Q: Can I use a non-stick frying pan on high heat?
    A: It’s best to avoid high heat with non-stick pans, as it can damage the coating. Stick to medium or low heat for best results.
  • Q: What’s the difference between a cast iron skillet and a non-stick pan?
    A: A cast iron skillet is better for high-heat cooking and searing, while a non-stick pan is ideal for delicate foods like eggs and pancakes.
  • Q: How do I clean and maintain a cast iron skillet?
    A: Clean your cast iron skillet with hot water and a scrub brush, then dry it immediately and rub it with a thin layer of oil to maintain the seasoning.
  • Q: What size mixing bowls should I get?
    A: A set with small, medium, and large mixing bowls covers most kitchen tasks, from whisking dressings to mixing large batches of dough.